
With everyone embracing digitalization by creating a website for their company, there are some critical elements you must focus for your ecommerce store’s success. A website stress test is one of them (or load test).
Gone are the days when people had to pay a lot of money to have their websites built. WordPress has simplified the process, and thanks to its page builders, almost anyone can create their own ecommerce store without knowing how to code.
However, before going live, you’ll want to make sure everything on your website is running properly, therefore a website load test is usually recommended.
Contents
What is Stress Testing?
Before we go into how to run a stress test on a WordPress website, let’s define what a stress test is, what it does, and why it’s important.
Sure, your website is doing well right now, but what if good fortune comes your way and one of your blog pieces becomes a viral hit? When a flood of visitors arrives on your page, your site sags under the strain, giving them a “BAD USER-EXPERIENCE.” Isn’t that something you don’t want? That’s when you realise the value of stress testing, which ensures that you’re ready for instances like these.
Stress testing allows you to determine how well your website performs when it is subjected to a specific degree of stress or load via software.
You can run a stress test in a variety of settings, such as low, normal, or heavy traffic; the user can design the load test and see the results.
Keep in mind not to send unreasonably high loads to your website. Evaluate realistic figures, inflate them slightly, and then send the load to your WordPress website to see how it responds. Keep track of your average traffic to get a sense of how busy it will be during peak hours or during a special event.
Overall, a stress test allows you to simulate traffic so you may assess your site’s performance by concurrently sending a stream of users to your site. The test will help you understand the strengths and limitations of your website so that you can adjust it to withstand traffic surges at any time.
Prerequisites for a WordPress Load Test
Sending “false visitors” to your WordPress site is part of stress or load testing, but this can conflict with your hosting provider in some situations. There are a few requirements that must be met in order to protect yourself from such annoyances.
Many hosting companies offer packages that allow you to have a certain number of visits on your site, and if that number is exceeded, you will be charged extra. When your site has unusually high traffic, it may be temporarily suspended.
Before doing a stress test, read the terms and conditions of your hosting plan, as many of them track your site’s traffic and have their own set of regulations to follow in specific circumstances.
Load testing might cause your site to crash or become extremely slow and unresponsive due to the handling of various resources. As a result, doing a load test before to going live with your website is the best practise.
How to Run a WordPress Website Stress Test
Let’s proceed with the steps to run a stress test on a WordPress website.
As discussed earlier, you need a tool to send the faux traffic to your site, so we will be using Loader.io as it’s a trusted tool for load testing. Follow these easy steps to run the load test on your WordPress site:
Sign up on Loader.io
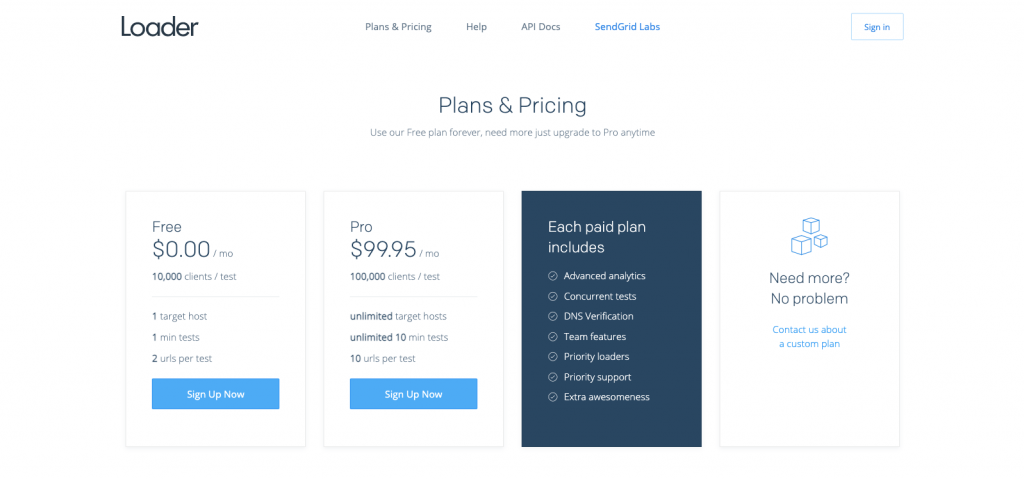
- Sign up for a free Loader.io account for trial purposes.
Note: Loader.io is a load testing tool, and its free account lets you test up to 2 URLs per test. If you are running a WooCommerce site, you can test on yoursite.com and yoursite.com/shop, so the free plan is quite sufficient – it allows testing up to 10,000 simulated visits.
Add Your Website’s URL
- Click on the New Host button and start configuring your test.
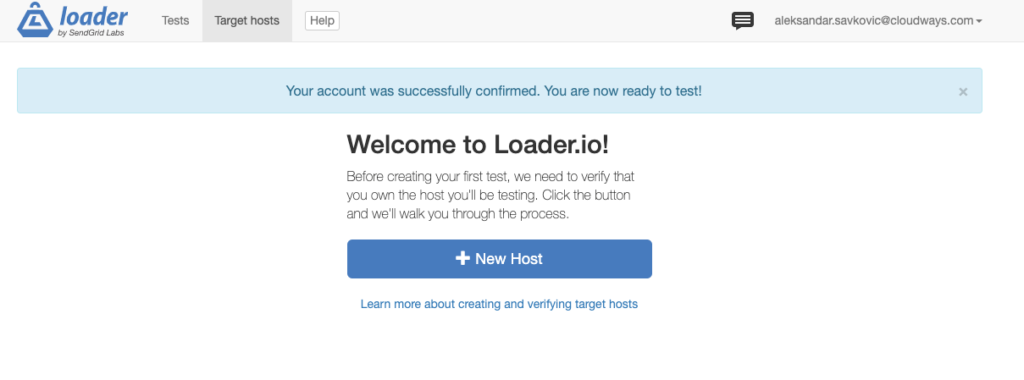
Verify your email address, then add your website’s URL.
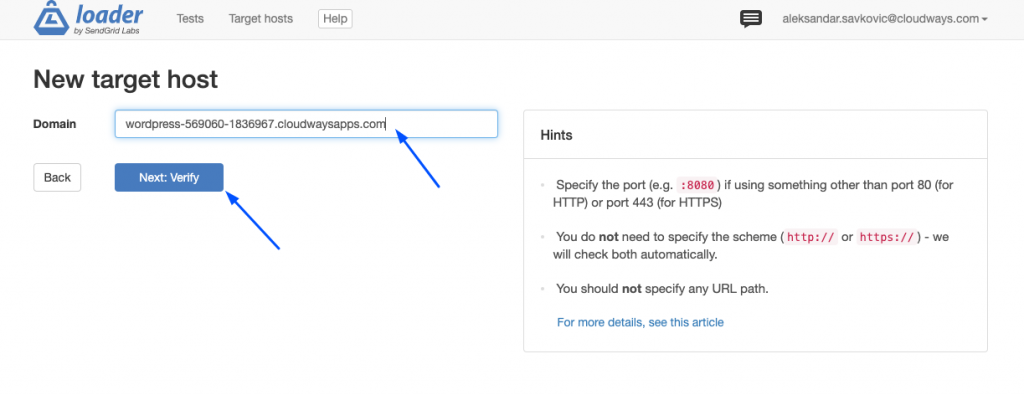
Test Configuration
- Once you’ve added the URL, click the verify button to get the verification file, or you can also do a DNS verification.
- Download the verification file.
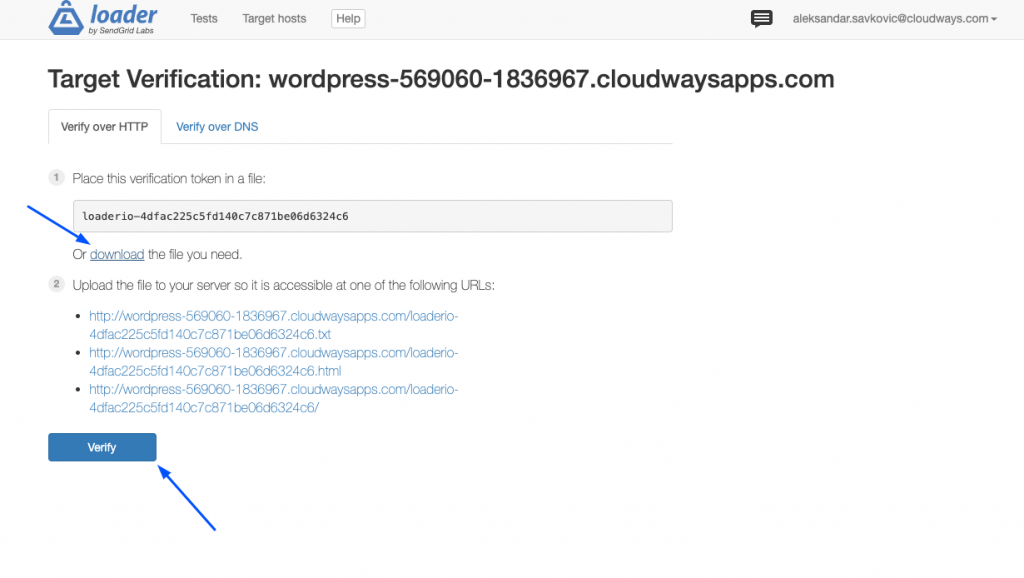
Verify via Loader.io
- Once your file has been uploaded, go back to the Loader.io dashboard and click Verify.
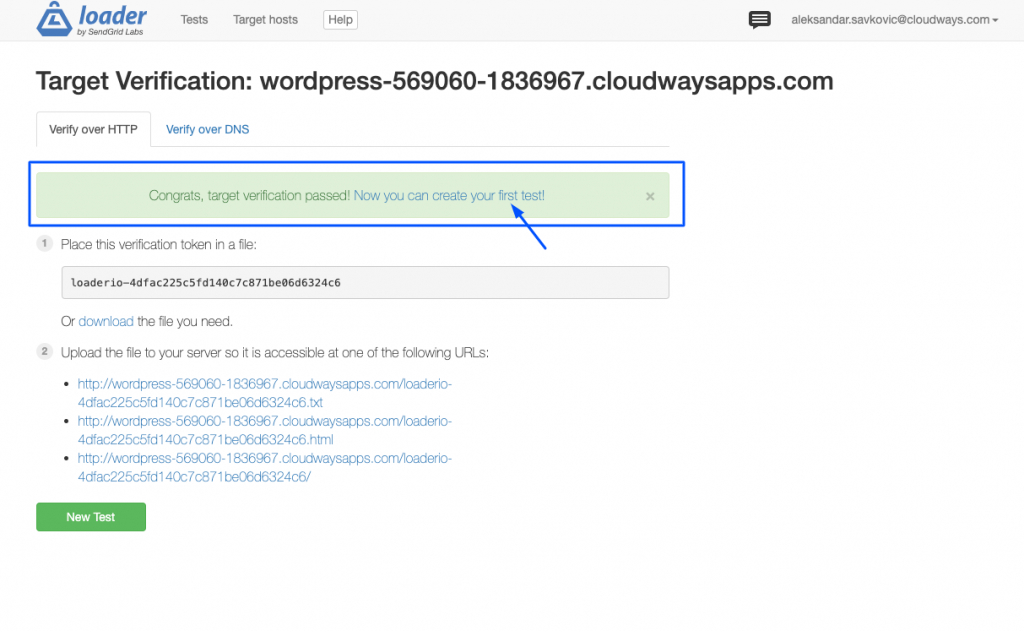
If Loader.io fetches the file and everything goes fine, you will see a green confirmation message. Click on the text to create your first test.
Create a Test
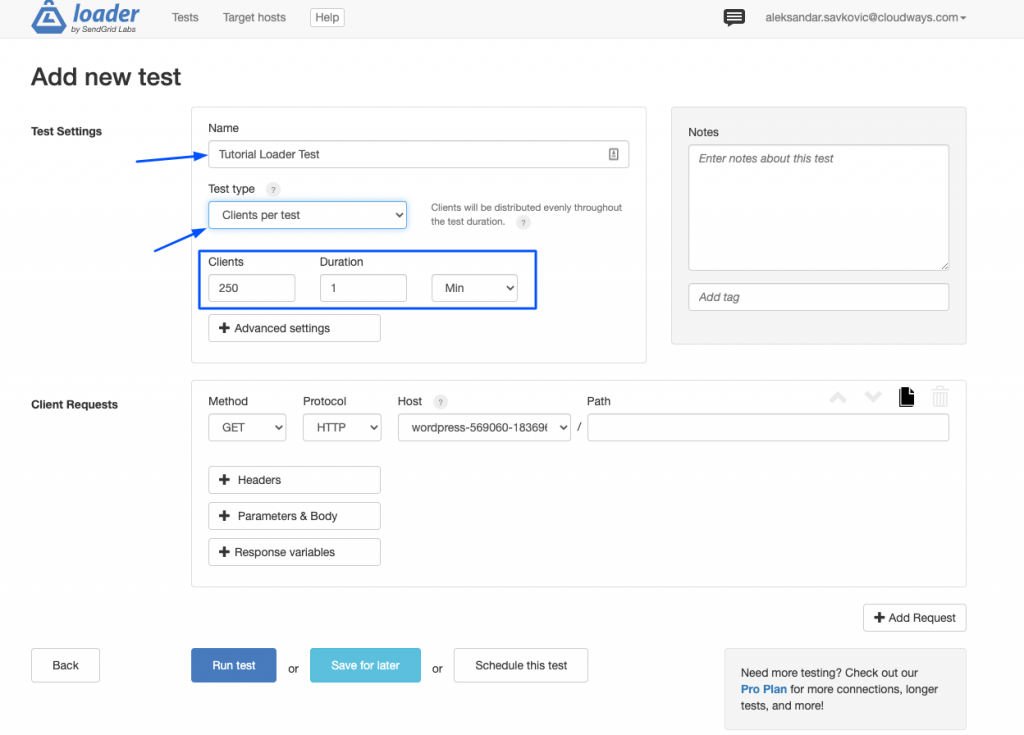
- After your website’s verification, create a test by naming it, picking up the simulation type, and the number of visits to simulate during a specific time period.
Run the Stress Test
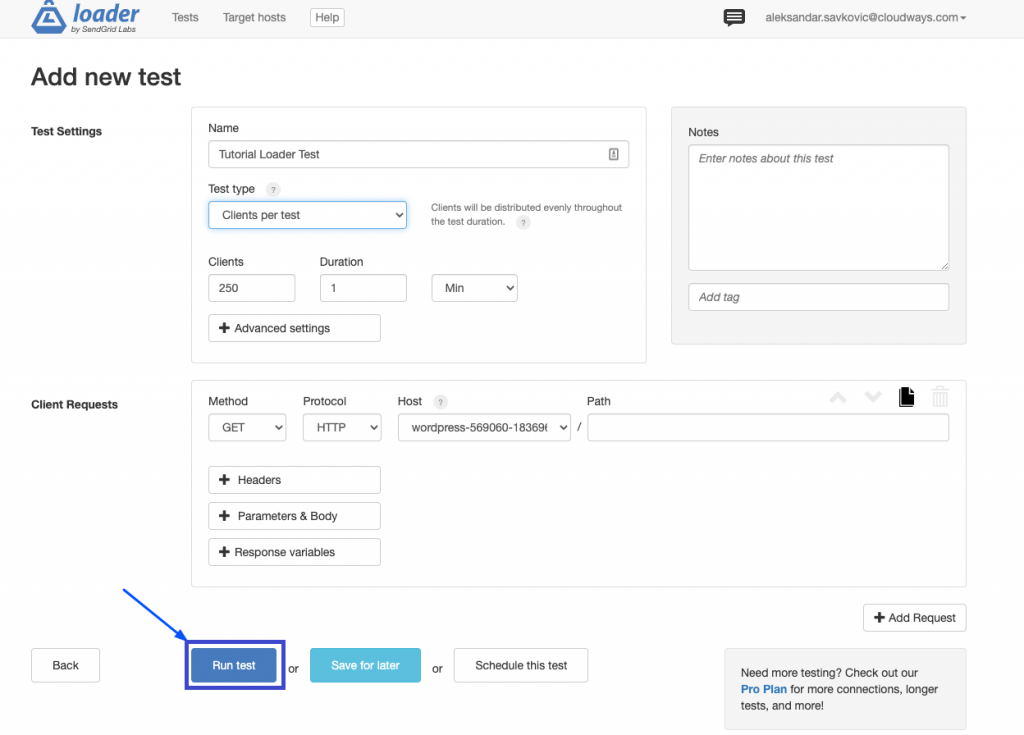
- Click the Run Test button to start stress testing on your WordPress website.
Observe the Results
- Watch the real-time simulation of your website.
We’ve simulated 250 visits per minute, with zero timeouts and response time between 277ms-720ms averaging 365ms which is an excellent result.

You can also check your server’s performance during the stress/load tests from your dashboard server management. Notice that one of our CPU parameters only saw 5% usage to serve 250 users in one minute.
How to Manage a WordPress Site with a Lot of Traffic
Every ecommerce company owner yearns for more traffic, but what happens when they finally get it? What if their website isn’t up to the task of dealing with excessive traffic and crashes? Every blogger’s worst nightmare is a faulty site that has been visited by a large number of people at the same time.
So, how do you maintain a WordPress blog with a lot of traffic? To control traffic surges, every website owner must adhere to a set of requirements.
Upgrade Your Hosting Plan
They say the more, the merrier; the analogy applies to your choice of hosting provider as well as a better hosting plan. This will help you handle high traffic much better than a restricted cheap hosting plan. You may request your hosting provider for a managed application upgrade. It allows you to easily scale up your server when you need more resources.
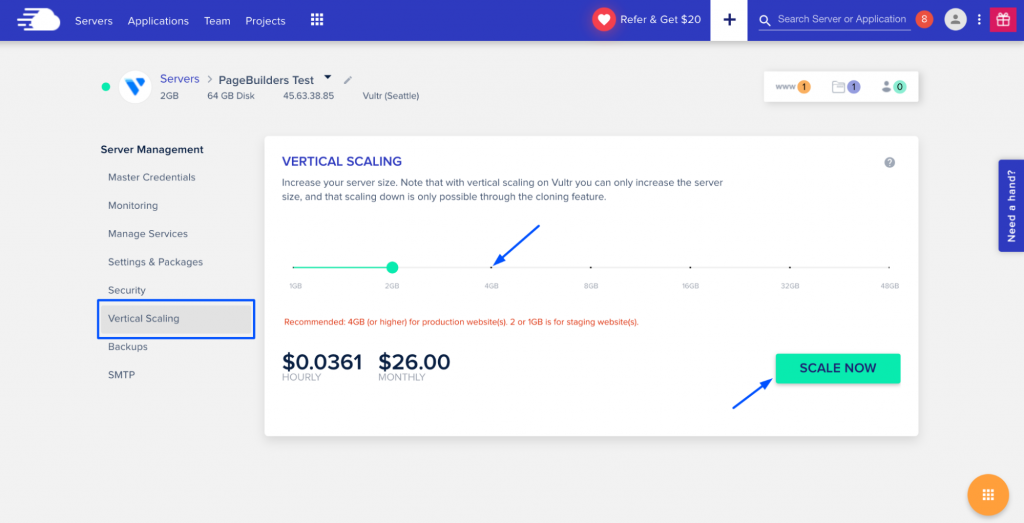
It offers tools to upgrade safely, as you can clone your server and perform the upgrade in the cloned server. You may also clone the application on the same server and then perform the upgrade. It is recommended to never do a direct upgrade on your production website
Server Resources
To run your WordPress website without issues, you’ll need a dependable web server with sufficient server resources.
Because high traffic numbers might place a strain on your web server, you’ll want to make sure that it has enough processing power and memory to handle the load.
Additionally, for a hassle-free WordPress site experience, make sure your hosting company has the most recent versions of MySQL and PHP.
Have a Minimalist Approach
Having a minimal approach to your WordPress site will eliminate half of your problems. Pick a theme that complements your brand even as it withstands high traffic. Don’t stuff up your site with a gazillion plugins. Instead, install those that add value to your site.
Use a Caching Plugin
Caching minimises the total load on your website; once enabled, WordPress will view the HTML versions of your blogs rather than the PHP versions, resulting in faster loading times. Although WordPress caching can be complicated, several free caching plugins, such as Breeze, efficiently cache your material so that it can be served to your visitors.
Invest in Managed WordPress Hosting
The most common mistake that newbies make is compromising on their hosting provider and plan for the sake of cutting costs.
Sure, you can get cheap hosting plans from various hosting providers, but be ready to sacrifice your site’s performance once the traffic starts coming. Cheap hosting can’t sustain load and stress. It will surprise your website visitors with unwelcome slow speeds and possibly a crash.
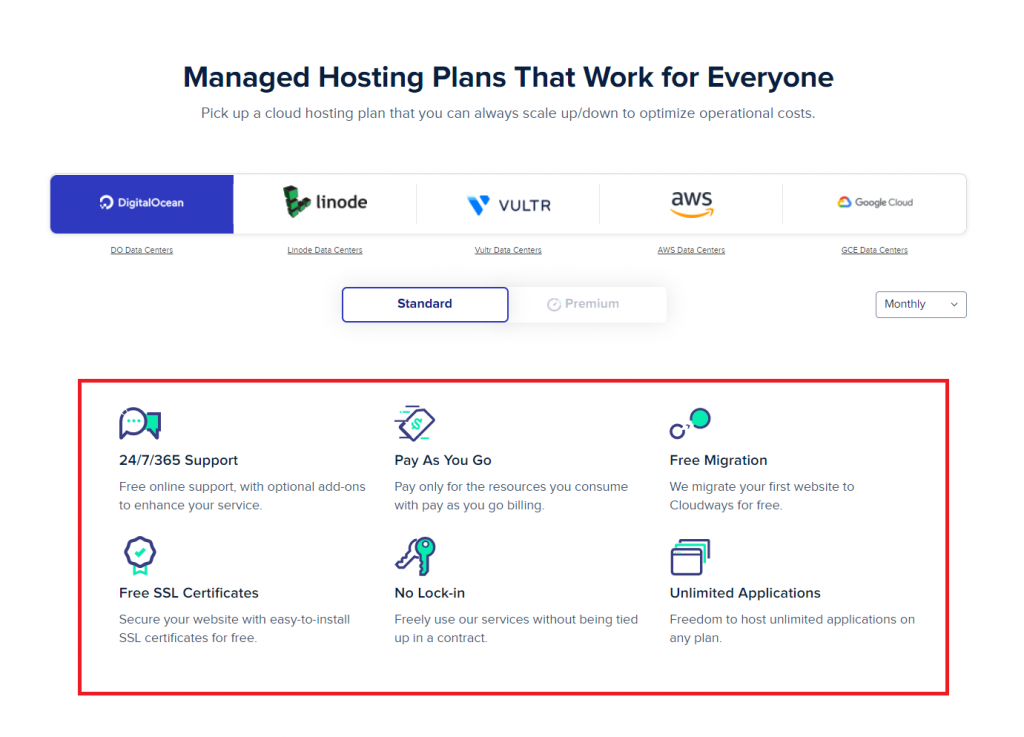
What’s the point of planning and investing in your website’s content when your cheap hosting can ruin everything? The ideal step to launching your WordPress website is to invest in a reliable and trusted hosting provider that provides an affordable, scalable, and secure hosting plan.
Reduce the size of the DOM
The Document Object Model (DOM) is the structural form of an HTML document that is rendered with CSS and JavaScript. Is it too technical for you? If you’ve ever used Google PageSpeed Insights to examine your WordPress site, you’ve probably encountered an error message that says, “Avoid an excessive DOM size.”
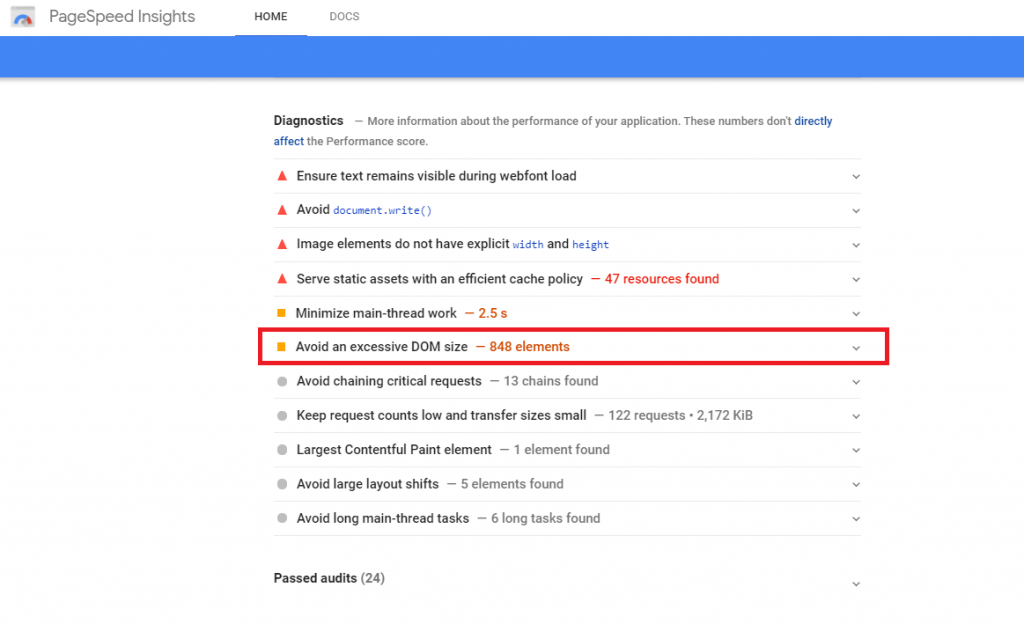
Higher DOM size can increase memory usage, TTFB and result in higher parse and render times. Improving your WordPress site’s performance requires the user to reduce their DOM size.
You can decrease the DOM size by lazy loading the videos, comments, and images on your site and segregating pages with excess content into separate pages. Additionally, using an SEO-friendly theme and trusted page builders can also help in reducing the DOM size.
Use a CDN
Content Delivery Network or CDN is a server network that is located all around the world. CDNs host your website’s content like CSS, JavaScript, etc., but are different from your WordPress host. They can help in boosting your website speed and eliminate slow loading issues.
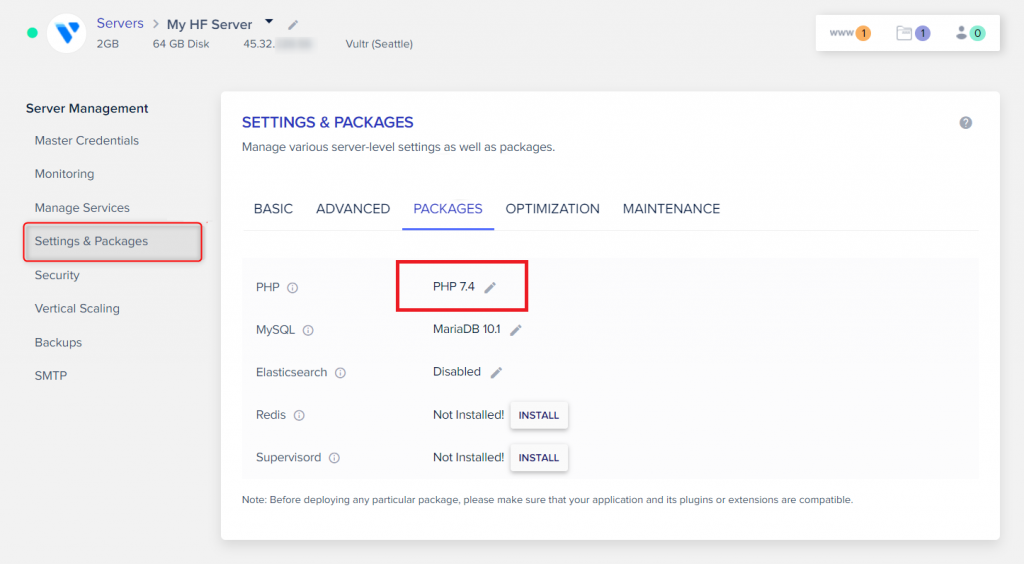
Update the PHP Version
Did you know that WordPress is mostly built on the PHP programming language, which is also used on your server? Using an outdated PHP version has a significant impact on the speed of your site, resulting in slow loading and a variety of other issues.
To keep your site running well, update the PHP version. Go to Server > Access Detail > Settings & Packages page and select your chosen PHP version if you wish to upgrade your PHP version .
Clean Code WordPress Theme
The majority of WordPress website owners choose themes based on aesthetic looks, which shouldn’t be the ideal metric to consider. Always select a theme that is not only optimized for speed but offers clean code.
A WordPress theme that has a plethora of features involves extra coding blocks, which increases your site’s loading times. Go minimal, and choose a lightweight theme for ultra speed and performance.
Wrapping It Up
Just as we humans can only tolerate a limited amount of stress without breaking down, so is the case with our websites. So, don’t be unkind to your WordPress website and run a load or stress test before going live to understand how much load your site can bear easily.
We have explained all the steps to conduct a stress test/load test on your website. Additionally, we have covered the tips and secrets to tackle high traffic and improve your site’s performance.
We also ran a test to get our metrics:
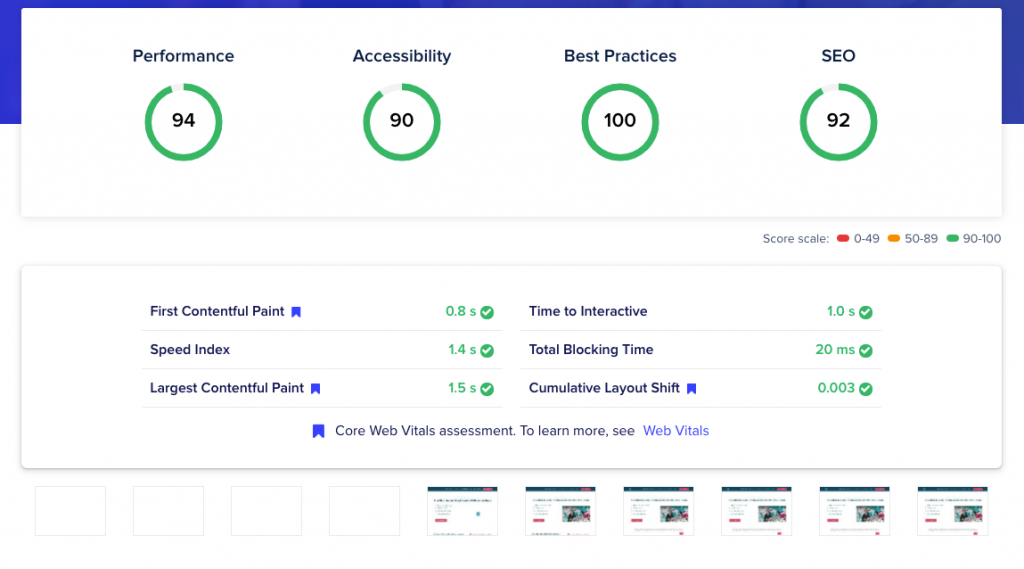
Remember, if your website is not optimized, it will use more server resources than it should, reducing the chance to serve more visitors with a good experience and site speed. Instead of just increasing resources, one should optimize the site’s performance since sometimes performance issues cannot be fixed by adding more RAM or CPU to your server.