
Are you having trouble uploading images to your WordPress site? Image upload issues can be perplexing for most beginners because they can arise without you doing anything unusual.
One of the most prevalent picture issues in WordPress is the failure to upload images. Fortunately, it’s a simple remedy that you can do yourself.
We’ll teach you how to simply fix the image upload problem in WordPress in this article. We’ll also go through what’s causing the problem and how to avoid it in the future.
What Causes WordPress Image Upload Error?
Incorrect file permissions usually cause WordPress image upload issues. You need precise file and directory permissions to run WordPress on your web hosting server.
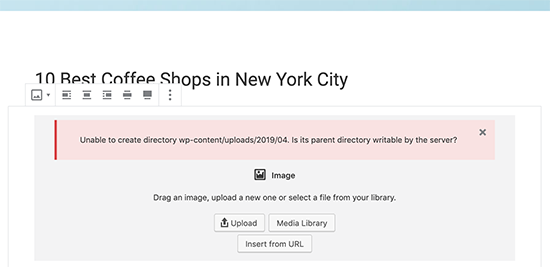
Incorrect file permissions prevent WordPress from reading or uploading files. This error may occur when uploading image files:
‘Cannot generate wp-content/uploads/2019/04. Is it readable by the server?’
The uploaded file could not be relocated to wp-content/uploads/.
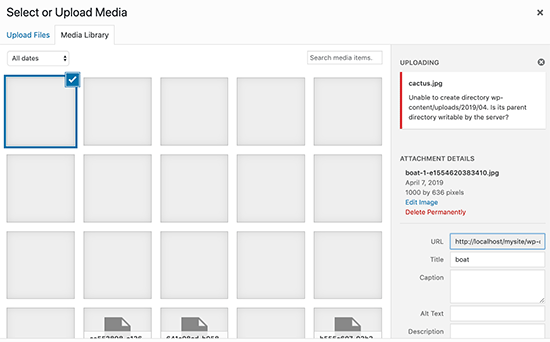
Your photographs may also vanish from the media library as a result of this problem.
Isn’t it true that my website used to work perfectly? Who modified the permissions on the file?
This could occur for a variety of reasons. It’s possible that a misconfiguration on your shared hosting server will change their rights without your knowledge.
For example, your site hosting company may have performed an upgrade that resulted in unanticipated changes to file permissions.
If everything else on your website is working well, you may simply change the file permissions to fix the image upload problem.
That said, let’s look at how to fix picture upload troubles on your WordPress site by setting proper file permissions.
WordPress Image Upload Error Fix
You will need to use an FTP client to alter file permissions.
Connect to your website using FTP, then navigate to the /wp-content/ folder. The uploads folder, which contains all of your media uploads, including photographs, may be found inside.
Select File Permissions from the context menu when you right-click on the uploads directory.
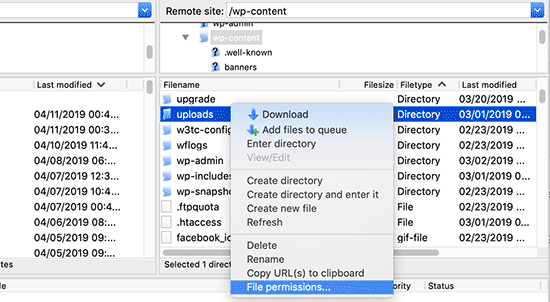
The file permissions dialogue box will appear as a result of this.
To begin, change the file permissions for the uploads directory and all of its subdirectories to 744.
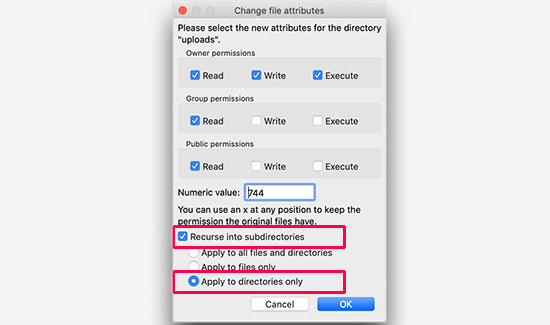
To do so, type 744 into the number value box and check the box next to the option to recurse into subdirectories. Now select the radio box that says “Apply to directories only.”
To save your changes, click the OK button. The file permissions for the directories will now be applied by your FTP client.
If adjusting directory permissions to 744 doesn’t appear to help, try 755.
You’ll need to establish file permissions for all of the files in the uploads directory in the following step.
To do so, right-click the uploads directory and choose file permissions from the menu. Change the numeric value to 644 in the file permissions dialogue box.
Recurse into subdirectories should be checked. Finally, select the ‘Apply to files only’ radio choice. To save your changes, click the OK button.
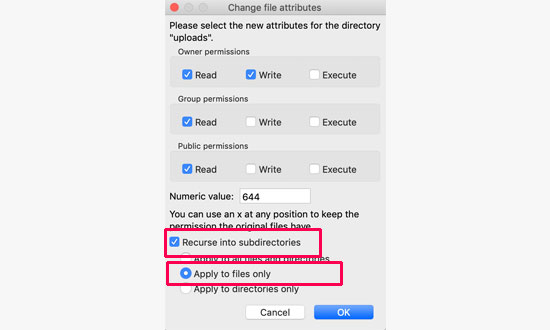
All files in the uploads folder will now have their permissions changed by the FTP client. You can now return to your WordPress admin area and attempt uploading images once more.
If your website has any file upload forms, you should test these as well.
Note: If you don’t know how to use an FTP client, you can utilize your WordPress hosting company’s file manager instead. Because each host’s screenshots will differ, you’ll need to contact their help to get guidance.
We hope this post was helpful in resolving your WordPress picture upload problem.