
Do you want to fix the WordPress error “installation failed: could not create directory”?
Alright! You’ve arrived to the right location.
WordPress is a fantastic content management system, and creating a WordPress website is a breeze. However, when it comes to repairing WordPress issues, it can be a time-consuming and frustrating process. Why? Because there is no one-size-fits-all approach to resolving WordPress issues. As a result, you’ll need to take some troubleshooting steps to figure out what’s causing the problem and how to fix it.
I’m assuming you’re trying to fix the could not create directory error in WordPress on your own in this article. If this is the case, you must carefully follow my directions. But, before getting into the troubleshooting procedure, it’s important to understand what causes the directory error in the first place and why it occurs. This way, you’ll understand why the error occurred, and the next time you see it, you’ll be able to resolve the problem in a matter of minutes.
What Does It Mean When It Says “Installation Failed: Could Not Create Directory”?
This problem is caused by incorrect site configurations and settings, which results in a file permissions issue. WordPress will not be able to create a folder or directory for your plugin or theme if your file permissions are incorrect.
You may encounter this problem when updating your plugin/theme or uploading picture files. The basic explanation, however, is the same in all circumstances, and it can be fixed using the same troubleshooting procedures. The update failed: could not create directory problem will display in the case of an update
What Causes the Error “Installation Failed: Could Not Create Directory”?
Reason No#1
A few security permissions were set up by your hosting company to protect the server and site directories from unauthorised alterations. This means you don’t have the authority to change your server’s or site’s structure.
A new plugin or theme generates a directory (with the plugin or theme name) in the wp-content folder during the installation process. To set up the file structure, you’ll need necessary permission. Similarly, the plugin or theme must have authorization to add new versions and remove old ones during the update process.
The permission mode is broken into three sections: write, read, and execute, each with its own numeric value that defines the authorization for the user, group, and world. I’ll show you how to configure permissions for your files and folders to avoid this mistake in this article, and if you’re curious about what is recommended for WordPress, you can learn more here.
Reason #2: If you have a lot of memory and no storage space, you can get this problem. As a result, it is usually recommended that you host your websites on a dedicated cloud hosting platform where you can easily scale up the server size with only a few clicks.
How can I fix the WordPress error “Installation Failed: Could Not Create Directory”?
This post will show you how to fix and avoid causing directory problems in WordPress sites using a few debugging approaches and procedures. So, let’s get this party started!
- Make a backup
To begin, make a backup of your entire website so that if anything goes wrong while doing the tasks, you may restore everything to its previous state. A hosting backup option, a WordPress plugin, or a manual technique are all options for creating a backup for your WordPress site. If you want to learn how to back up a WordPress site, follow this step-by-step tutorial. - Optimized Disk Usage
As previously stated, this error can occur due to a lack of disc space. As a result, you should keep an eye on your server’s specifications, particularly the RAM portion. If your server memory is full, you can increase the size of your server or do a disc optimization to clear superfluous files and folders. You’ll be able to make room for your plugin/theme installation this way.

If your server has enough memory space and you are still encountering could not create directory error, you need to continue the reading process.
3.Resetting Permissions on Files and Folders
I’ll reset my file and folder permissions, and I hope this capability is accessible on your current hosting. If it isn’t, you may skip this step and go to the next, where I used an FTP client like FileZilla to execute the file permission setting process.
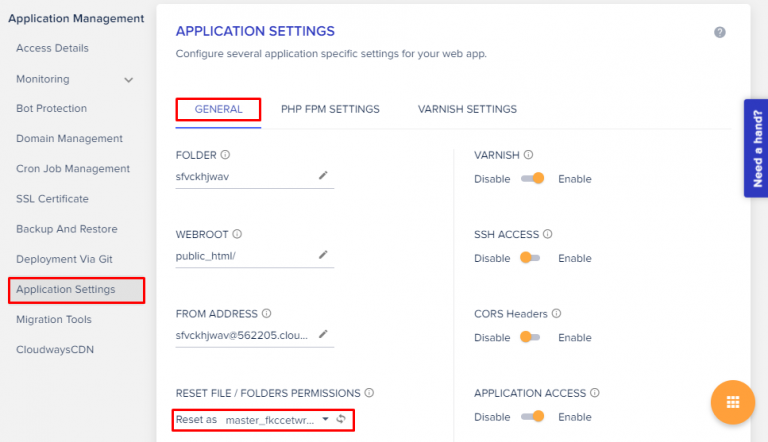
A managed cloud hosting platform contains all of the necessary capabilities and is specifically built to deliver a stress-free hosting experience. To reset the file ownership navigate to application management panel > application settings > general > reset file/folder permission.
When you click the reset button, the permissions for directories and files will be reset to 774 and 664, respectively. If you’re interested in learning more, we’ve written an article about resetting file and folder permissions.
- Using an FTP Client to Set File Permissions
This step will show you how to adjust the permissions of files and folders using an FTP client such as FileZilla. So, I’m assuming you’ve already installed the FileZilla FTP client; if not, here’s the link to get it.
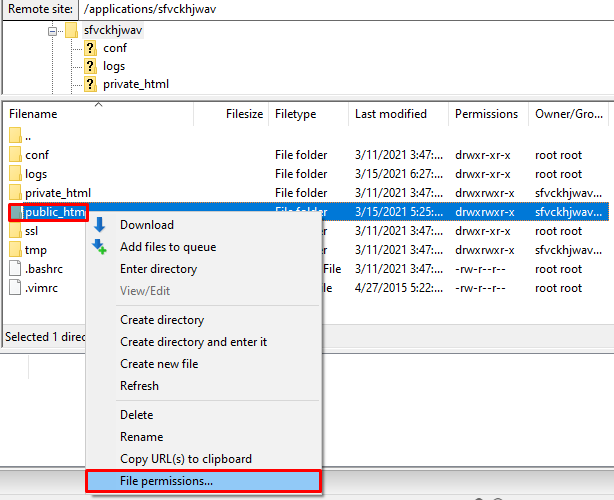
To connect remotely, you must first start the FileZilla application and submit your server’s access credentials. After that, right-click (mouse) the public html folder and select file permissions.
Next, you need to set 755 in the numeric value field > select recurse into subdirectories > apply to directories only and click ok.
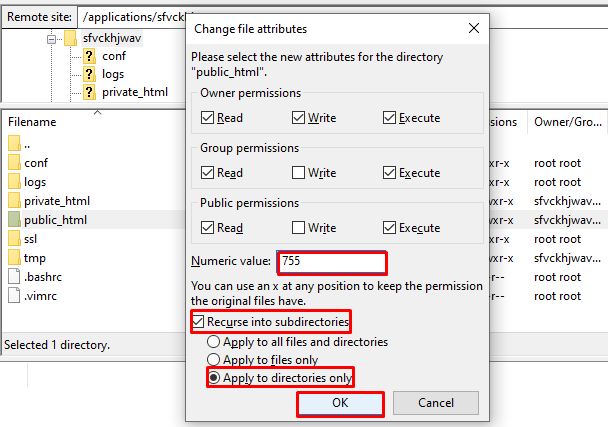
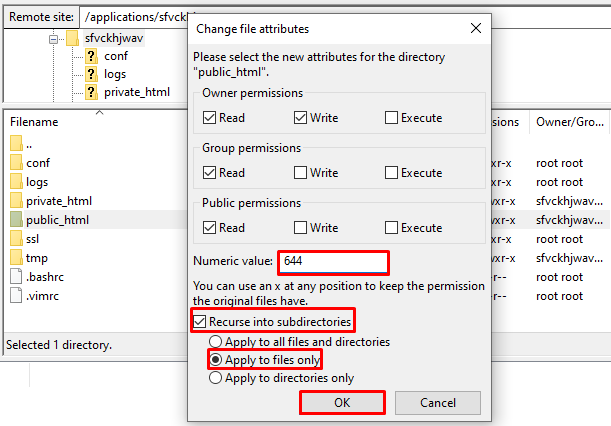
You need to repeat the same actions for file permission and set 644 in the numeric value field > select recurse into subdirectories > apply to files only and click ok.
Clear your cache and try to install/upgrade your plugin/theme again after you’ve set the file and folder permissions.
- Keep an eye on the application logs
Viewing and monitoring your application’s access and error logs is a smart idea. You may see the process information for each running request and error this way. Most trustworthy hosting providers include log monitoring as part of their platform, and I hope it’s the same for you.
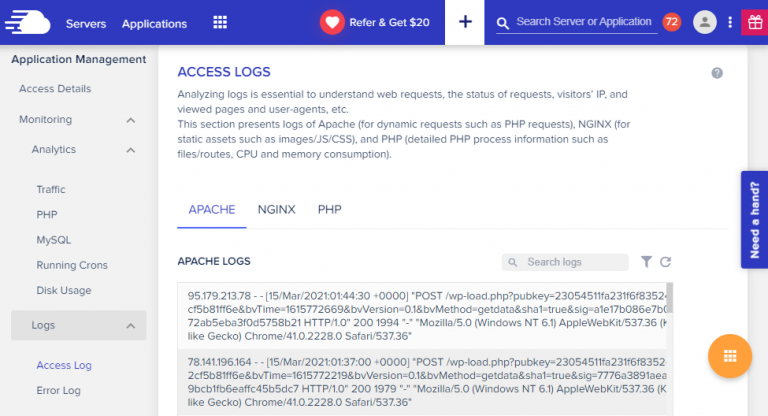
This function will notify you if your website isn’t working properly and has faults. To access your 1000 most recent logs, use the search and filter features. You can also view other HTTP status code logs, such as 403, 404, and 501.
Wrapping up!
I hope this article clarified what the installation failed: could not create directory error means and how to resolve the file permissions problem. Please let us know if you have any other ideas for how to fix this mistake in the comments area below. I am confident that it will be useful to those who are dealing with similar challenges.